Bucks Back in Time
Buckinghamshire has a number of Iron Age Hillforts along the line of the Chiltern Hills.
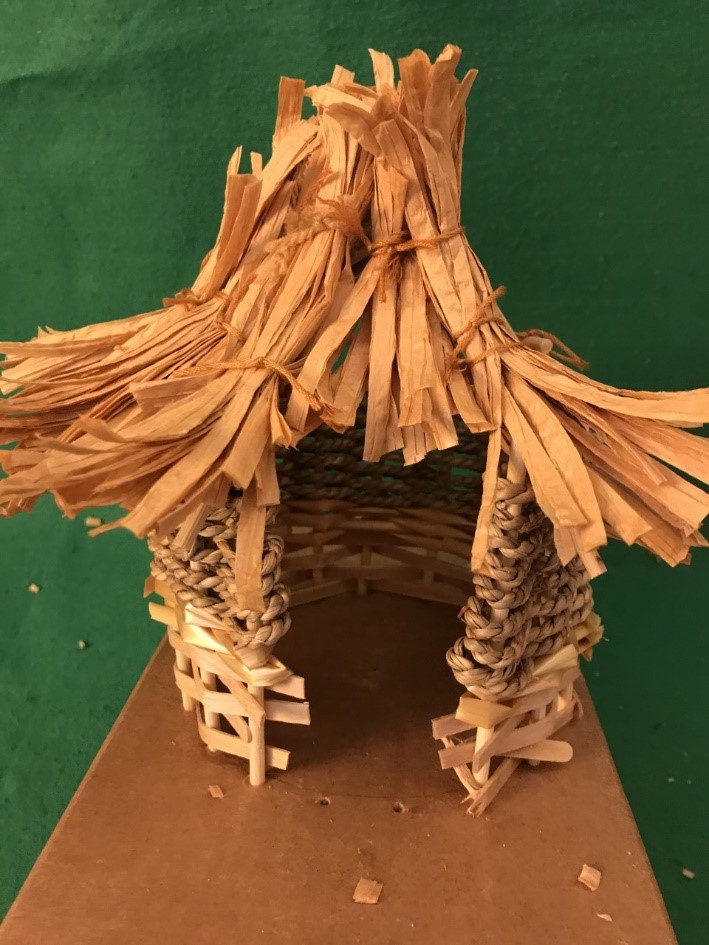
Iron Age people lived on farmsteads or small settlements, keeping animals and growing crops. Sheep would be kept for wool as well as for meat. Weaving was important to the Celts and not only did they weave fabric for clothing, they also wove their houses. Families lived in roundhouses made of woven natural materials, such as flexible tree branches. Rooves were thatched with grasses, rushes and straw. These circular dwellings were larger versions of the houses lived in by Stone Age and Bronze Age people but they were built in similar ways.
Create your own woven roundhouse
This project probably has a difficulty factor of 10 out of 10. It is good to have someone to help hold things in place AND it is very important to be careful and patient when building your model or you risk it breaking!
You will need:
- A box for the base
- Stakes : Bamboo bbq skewers (or sticks, dowels etc)
- Glue (a strong glue is best for this)
- Garden secateurs (if using wooden skewers etc) or scissors
- Weavers: (we used soaked coffee stirrers, sections of natural straw and seagrass cord but anything like drinking-straws, bendy paper dowels, string, wool, thin bendy sticks (e.g. shoots from willow or hazel), long grasses, ribbon, strips of paper etc) THESE MUST BE THINNER THAN YOUR STAKES and if not pliable already, may need to be soaked for an hour or so
- Raffia, straw, long grasses or any other ‘thatching’ materials
- String, thread etc to tie things onto the structure with
- Decorating resources e.g. pencils, paint, felt tips
Instructions
1.Make your base for weaving:
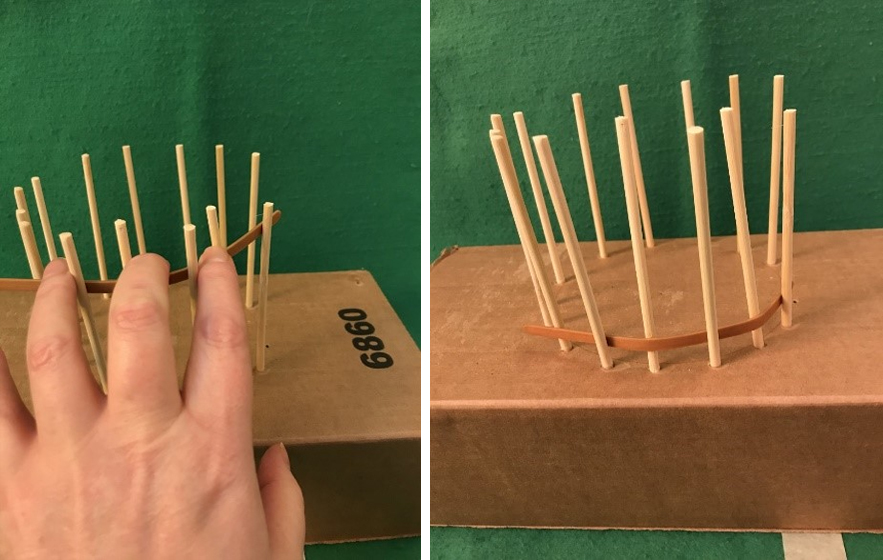
Take your box and draw a circle where your roundhouse will be
Around the outside of the circle, make small holes for your stakes to sit in setting them 2 or 3 centimetres apart. I left a space for an entrance at one end.
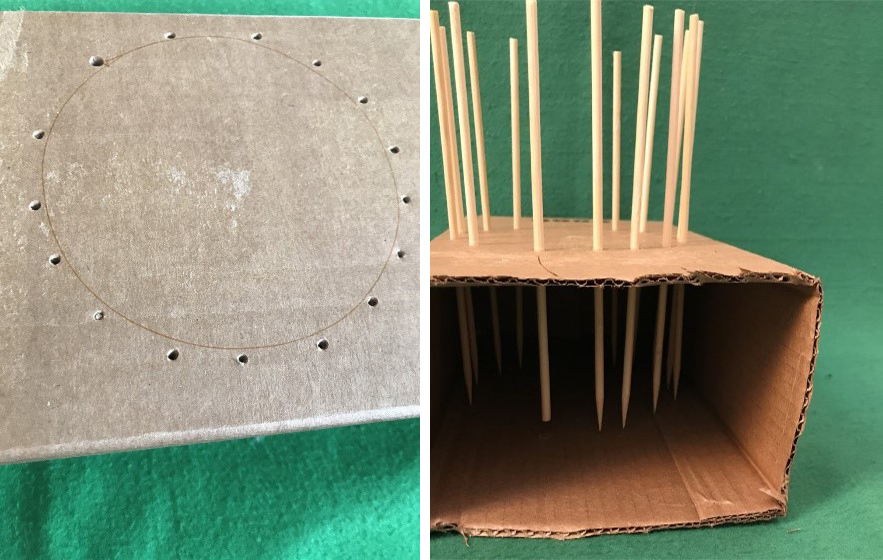
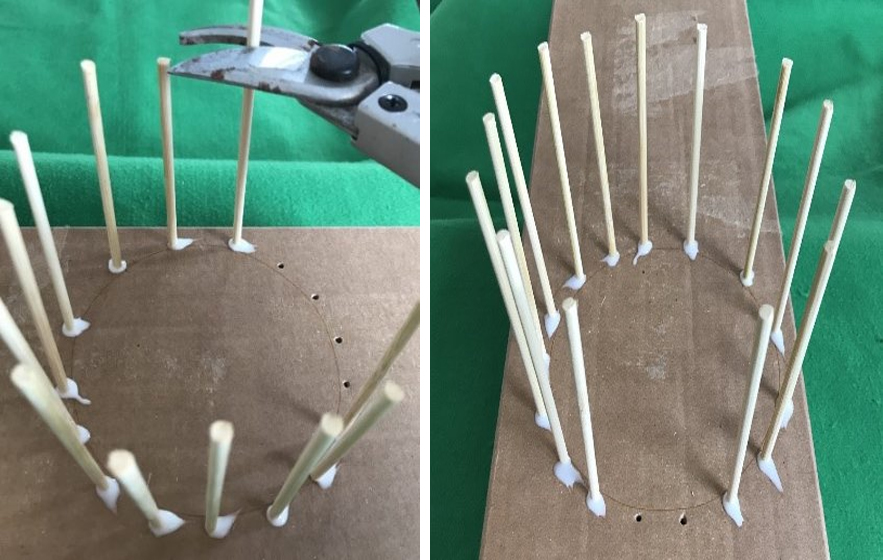
Add glue into the holes and push your stakes through, letting them rest on the bottom of the box beneath. These stakes will become your ‘uprights’ or posts. Trim to the height you want with secateurs – ask an adult to do this for you. Leave to dry completely. I left mine overnight.
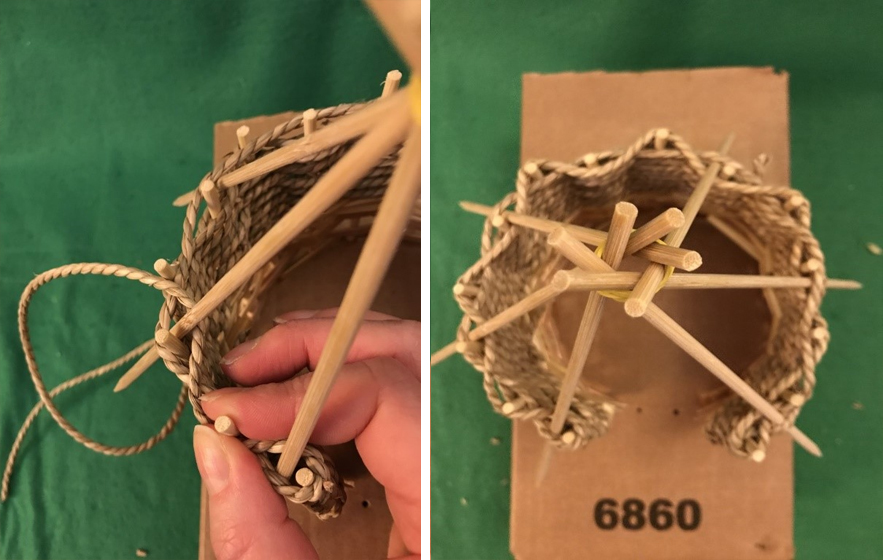
2. When your base is dry, you can start building your ‘wattle’ walls, weaving between the stakes, just like you are building a basket. To do this:
- Place a weaver between the first 2 stakes and weave in and out to build up the walls of your roundhouse. The first few layers are tricky and you need to be very gentle so as not to disturb your stakes. It is best to hold the stakes in place and bend your weaver around it.
- Remember to leave a section free for a doorway.
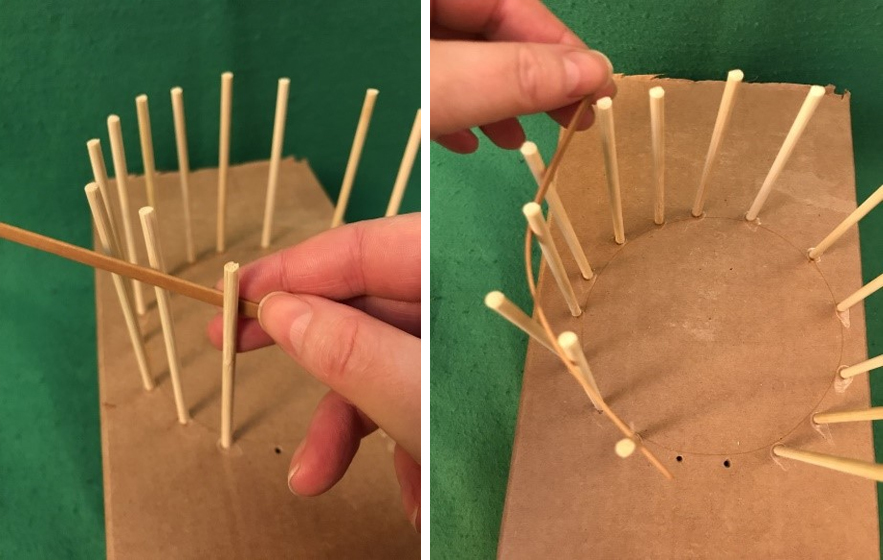
When your weaving gets to the doorway, you can loop back around the stake and carry on in the other direction (depending on how bendy your weavers are).
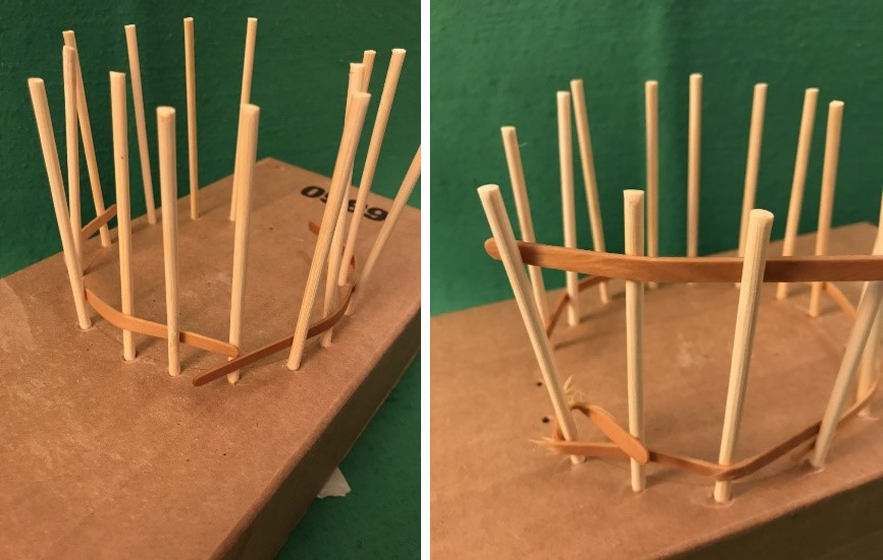
Try to keep your weaving nice and tight as this will help to hold your stakes in place
3. When you reach about a centimetre from the top of your walls, it is time to do your roof structure:
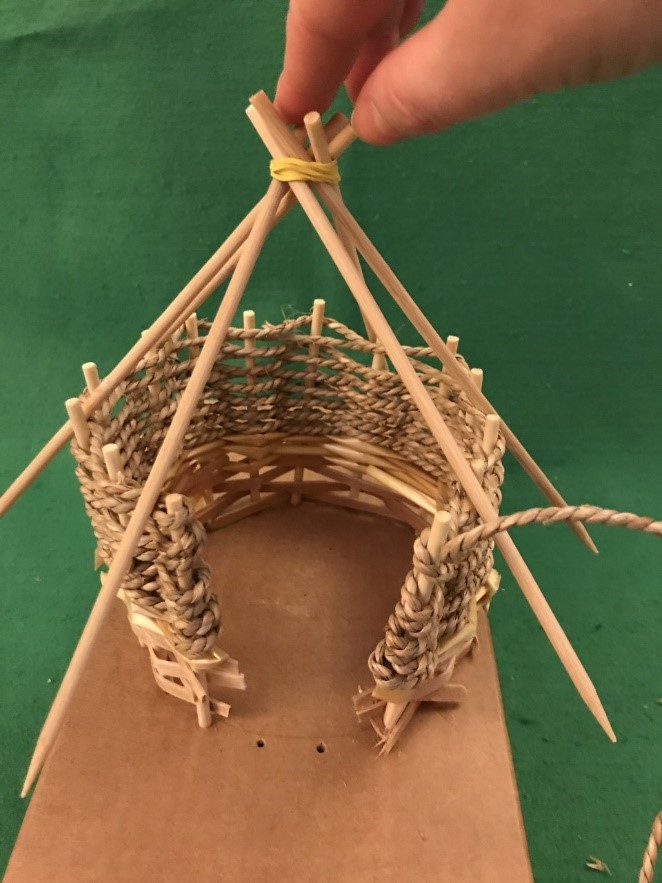
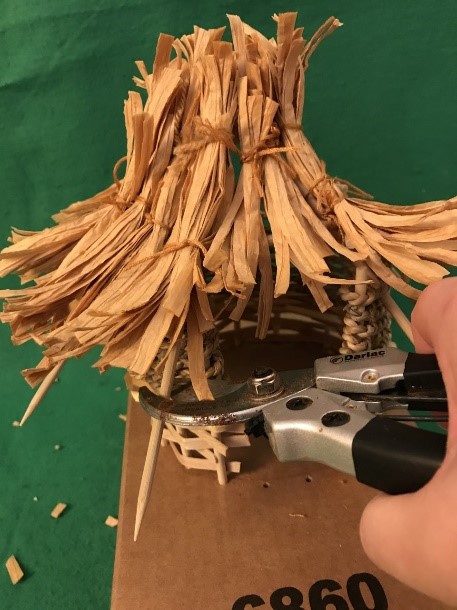
- Take 6 skewers and tie an elastic band around them to join. These will be your ‘rafters’. In the Iron Age these roof beams could reach almost all the way down to the ground so you could make yours really long. I did, but trimmed them with secateurs at the end because I decided to do a shorter thatched roof
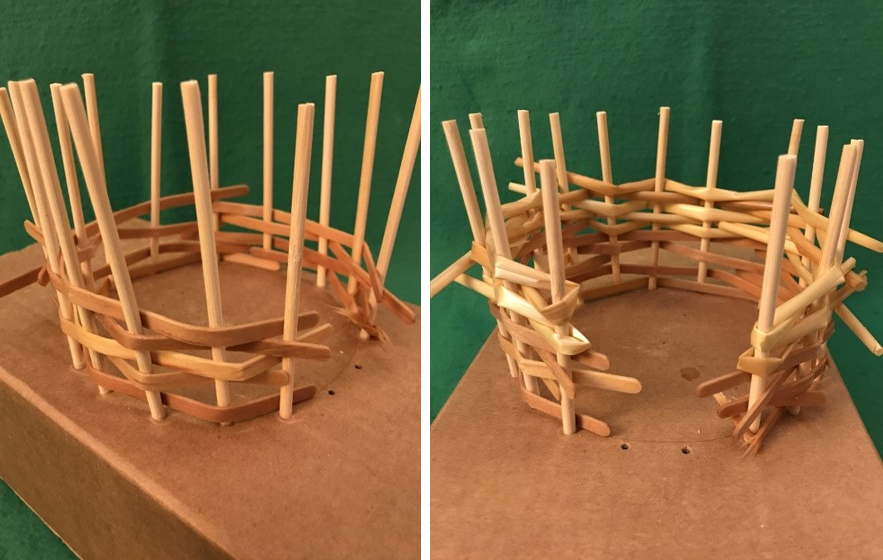
- Spread the rafter ends out so that they create a cone shape
- Sit this structure on your walls so that each of the rafters sits next to a stake
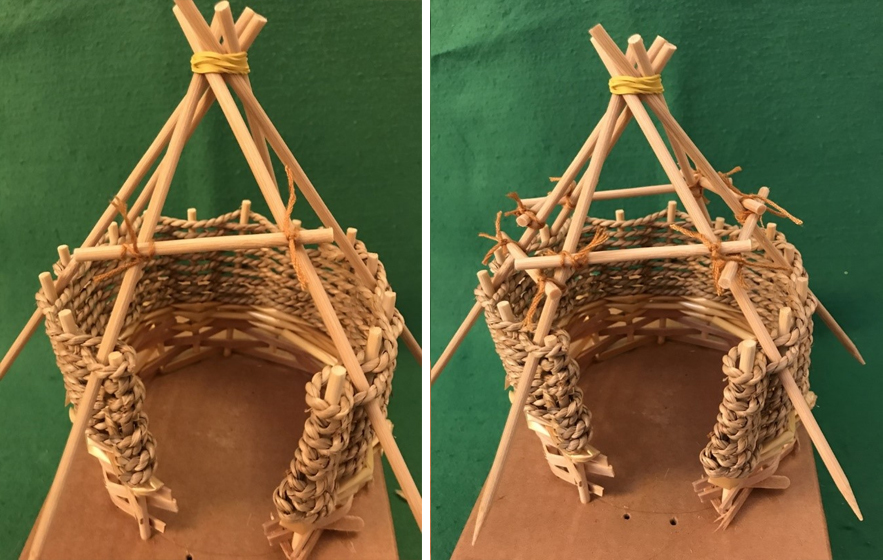
Continue with your weaving, but include the roof rafters alongside your stakes
Your rafters will need extra support and so add some smaller horizontal rods between them. I have tied mine on with thread
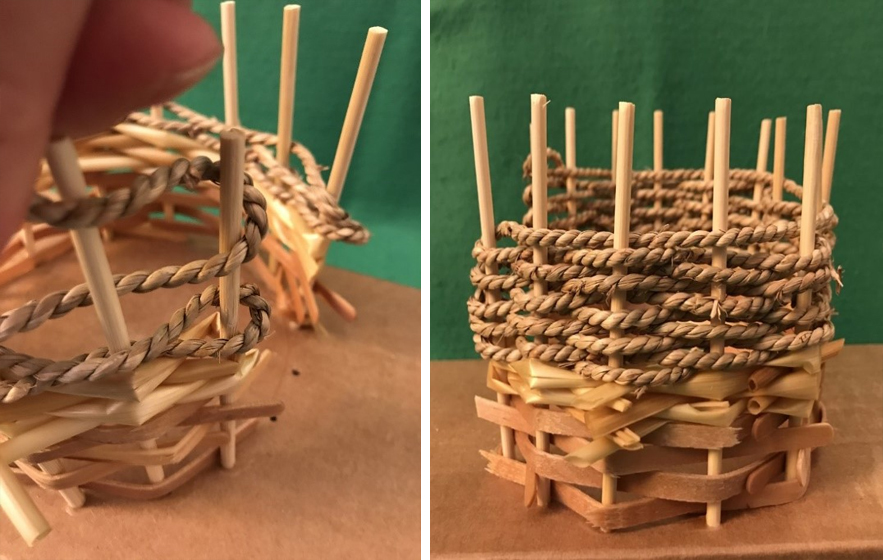
4. Thatching time!
- Tie bundles of straw, raffia or shredded paper together
- Tie them onto your rafters or supports so that they form a thatched roof
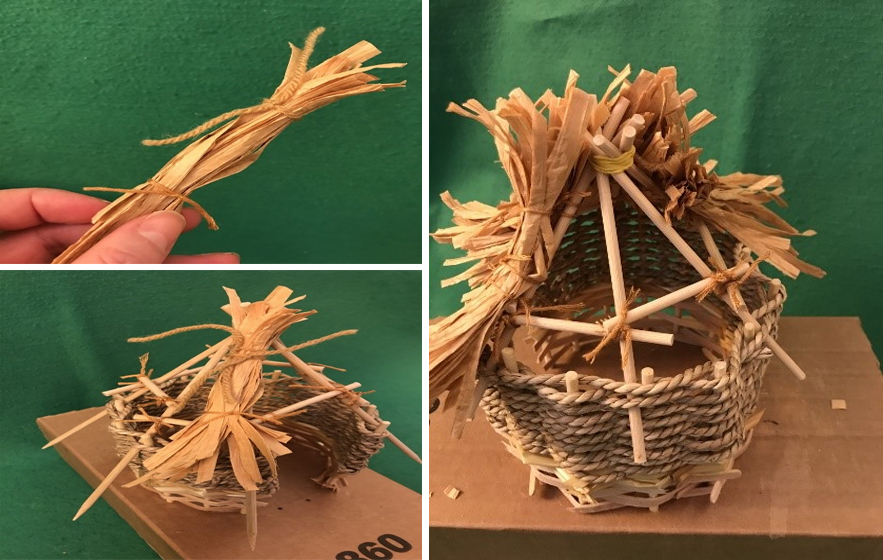
Once finished, you can trim your rafters if needed and thatch.
5. If you want to, you can cover the walls in clay or mud (called ‘daub’) for a completed roundhouse look. I have kept mine bare because I like to see the basket construction
6. Now decorate the box so that it becomes part of the prehistoric landscape. You could also add strip of card inside to line the walls, featuring celtic-inspired art patterns, or make some simple furniture or a hearth in the centre!